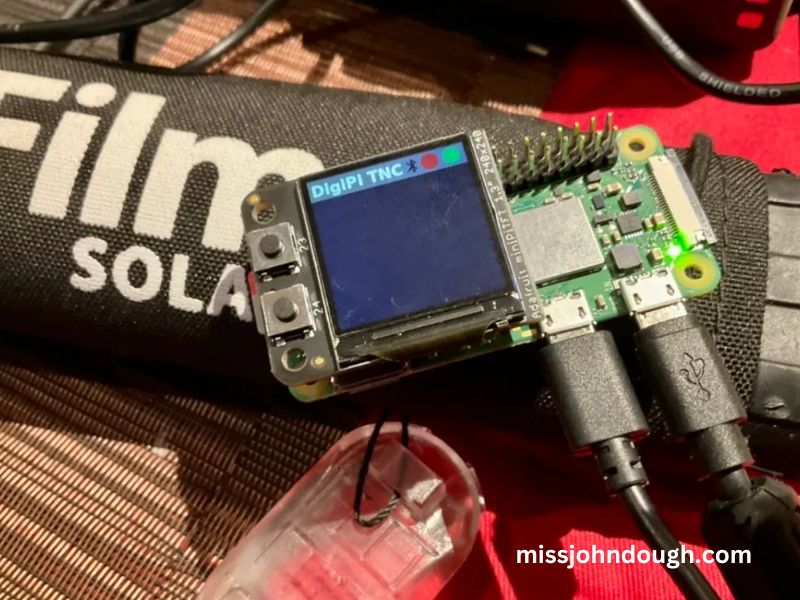
Assembling the DigiPi with a Raspberry Pi Zero W is a rewarding project that enhances your digital communication capabilities. This guide provides detailed, step-by-step instructions to ensure a smooth assembly process, focusing on key components and configurations.
Table of Contents
- Introduction to DigiPi and Raspberry Pi Zero W
- Required Components
- Hardware Assembly
- Software Configuration
- Testing and Troubleshooting
- Conclusion
Introduction to DigiPi and Raspberry Pi Zero W
The DigiPi is a versatile digital communication interface designed for amateur radio enthusiasts. When paired with the Raspberry Pi Zero W, it enables various digital modes, including FT8, PSK31, and APRS. The compact size and wireless capabilities of the Raspberry Pi Zero W make it an ideal choice for portable operations.
Required Components
Before starting the assembly, ensure you have the following components:
- Raspberry Pi Zero W: A compact single-board computer with built-in Wi-Fi and Bluetooth.
- DigiPi Interface Board: The main board facilitating communication between the Raspberry Pi and your radio.
- MicroSD Card (4GB or larger): For storing the operating system and software.
- Micro-USB Power Supply: Provides power to the Raspberry Pi.
- USB OTG Cable: Necessary for connecting USB devices to the Raspberry Pi Zero W.
- Audio Interface: Depending on your radio, an audio interface like the Fe-Pi Audio Z v2 or Audio Injector Zero is required.
- Cables and Connectors: Appropriate cables to connect the DigiPi to your specific radio model.
Hardware Assembly
Follow these steps to assemble the hardware components:
Step 1: Prepare the Raspberry Pi Zero W
- Insert the MicroSD Card: Flash the DigiPi software image onto the MicroSD card and insert it into the Raspberry Pi Zero W.
- Attach the Audio Interface: If your radio requires an external sound card, attach the chosen audio interface (e.g., Fe-Pi Audio Z v2) to the Raspberry Pi’s GPIO header.
Step 2: Connect the DigiPi Interface Board
- Align the Boards: Carefully align the DigiPi interface board with the Raspberry Pi Zero W, ensuring the GPIO pins match correctly.
- Secure the Connection: Use appropriate standoffs and screws to secure the DigiPi interface board to the Raspberry Pi.
Step 3: Connect to the Radio
- USB Connection: For radios with USB ports (e.g., IC-7300, Yaesu 991), connect the Raspberry Pi Zero W to the radio using a USB OTG cable.
- Audio and PTT Connections: For radios without USB ports, connect the audio interface and configure the Push-to-Talk (PTT) circuit as per your radio’s requirements.
Software Configuration
After assembling the hardware, proceed with the software configuration:
Step 1: Boot the Raspberry Pi
- Power On: Connect the micro-USB power supply to the Raspberry Pi Zero W.
- Access the DigiPi Hotspot: Wait for the “DigiPi” Wi-Fi hotspot to appear on your device. Connect using the default password.
Step 2: Configure Wi-Fi Settings
- Access Configuration Page: Open a web browser and navigate to “http://10.0.0.5/wifi.php“.
- Enter Credentials: Input your home Wi-Fi SSID and password.
- Reboot: Restart the Raspberry Pi to apply the new settings.
Step 3: Finalize Setup
- Access DigiPi Interface: After rebooting, access the DigiPi interface by navigating to “http://digipi/” in your web browser.
- Initialize Settings: Click on the “Initialize” link and enter your callsign, grid square, and other necessary information.
- Reboot: Reboot the device to finalize the configuration.
Testing and Troubleshooting
Testing
- Functionality Check: Verify that the DigiPi is communicating effectively with your radio by testing different digital modes.
- Network Connectivity: Ensure the Raspberry Pi Zero W is connected to your home network and accessible via the assigned IP address.
Troubleshooting
- Wi-Fi Connection Issues: If the DigiPi hotspot reappears, it indicates a problem connecting to your home Wi-Fi. Recheck your SSID and password.
- Audio Interface Problems: Ensure the audio interface is compatible with your radio and correctly connected.
- PTT Configuration: Verify the PTT circuit is functioning correctly, especially if using radios without USB ports.
Conclusion
Assembling the DigiPi with a Raspberry Pi Zero W expands your digital communication capabilities, offering a compact and portable solution for various digital modes. By following this comprehensive guide, you can successfully set up and configure your DigiPi system, enhancing your amateur radio experience.


